

It’s amazing just how much a coat of paint (or two) can totally transform a room. We recently moved into a 1970s era home and started tackling some of the more surface-level renovations shortly after we moved in.
One of these projects included painting the brick fireplace in our main living room. I get asked about it often so thought I’d share how I did it!
What you’ll need:
- Wire brush
- Vacuum
- Gloves and goggles
- Bucket of soapy water or TSP (trisodium phosphate)
- Painter’s tape
- Paint suitable for brick (I used this Behr interior/exterior Masonry, Stucco, and Brick paint)
- Standard paint roller
- Angled paint brush
- A free weekend
Brick soaks up paint like you wouldn’t believe, so this took me three coats, and I could have possibly done a fourth. Since the paint has a four-hour recoat time, I suggest clearing a weekend to get this done.
Here are the 6 steps I took to go from a red brick to bright white fireplace:
1. Scrape the brick. I got a wire brush similar to this one from Home Depot. I gently scraped away some of the excess dirt and build-up. I can’t emphasize the word ‘gently’ enough as you don’t want to dig away at the mortar. Also, this part made me cringe as it’s like nails on a chalkboard. If that’s the case for you, know you’re not alone!

2. Vacuum the debris. Once you’ve gone over the entire fireplace with the wire brush, vacuum up all of the debris. I used our shop vac, but if your household vacuum can handle debris like this, then I see no reason why you couldn’t use that instead.

3. Clean the brick. Get a bucket with some warm soapy water and wipe the brick clean. If you wish, you can use TSP (trisodium phosphate) similar to how you’d clean walls prior to painting. If using TSP, make sure to do it safely using gloves, goggles, and ventilate the room well. Regardless of whether you use soapy water or TSP, try using a cloth that won’t shed lint onto the brick as it’ll show up in your paint. You can also wait until it dries and then vacuum up any remnants left behind (I had to do this!).

4. Wait for the fireplace to fully dry. Waiting is the hardest part, no? You’ll want to make sure the brick is fully dry before taping and then painting though, or you won’t get your desired outcome.
5. Tape all edges and areas you don’t want to paint. This is such an arduous step, but it will help you have a nice and clean finish, so in my mind it’s worth it. I used a standard green painter’s tape for this. I also covered the tiled area with paper.

6. Time for paint! I used this Behr Interior/Exterior Masonry, Stucco & Brick paint, which I had tinted to match our trim. I used a regular angled brush and dabbed paint along the mortar to begin. I then took a non-textured regular roller to coat the brick. The brick absolutely drinks up the paint, so I did three coats and waited at least four hours in between each. It’s tempting to use a lot of paint per coat, but make sure you don’t use too much at once or you’ll spend endless amounts of time trying to wipe up those drips before they dry and harden (I learned this the hard way!). Important note: I did not paint the interior of our fireplace so speak to a paint expert to ensure safety and fire resistance before you do.

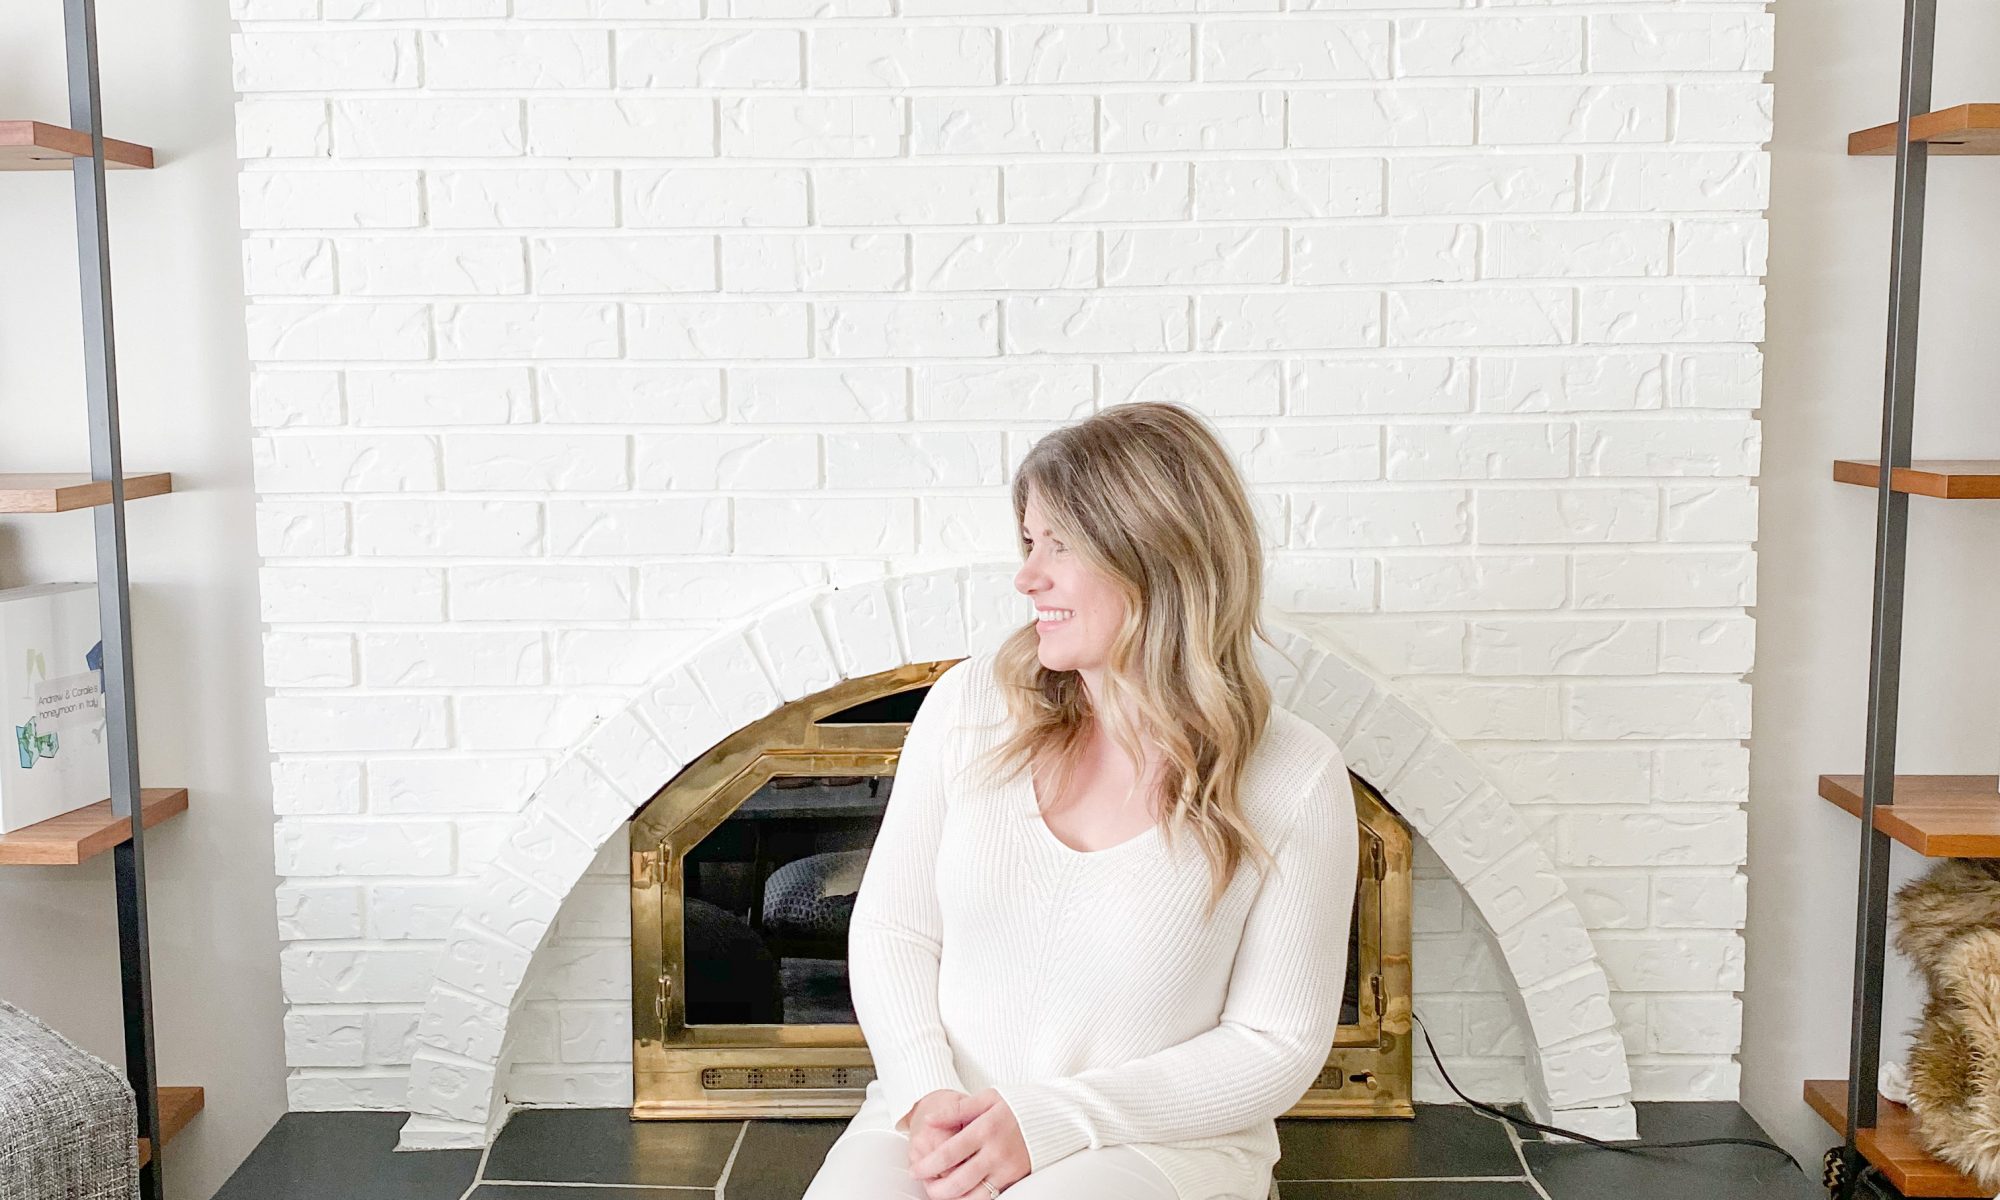
And voila! Here are the before and after shots:


What do you think? Did you try this? Let me know how it goes and share your before and after photos with me on social media at @coralie_stern or @livelyco_inc on Instagram or Twitter, or LivelyCo’s Facebook page.
(Special thanks to my friend Danielle of the Moreau Real Estate Team for support on this project!)